Category Archives: Anderson plug

Grenadier – more build details

Things done recently:

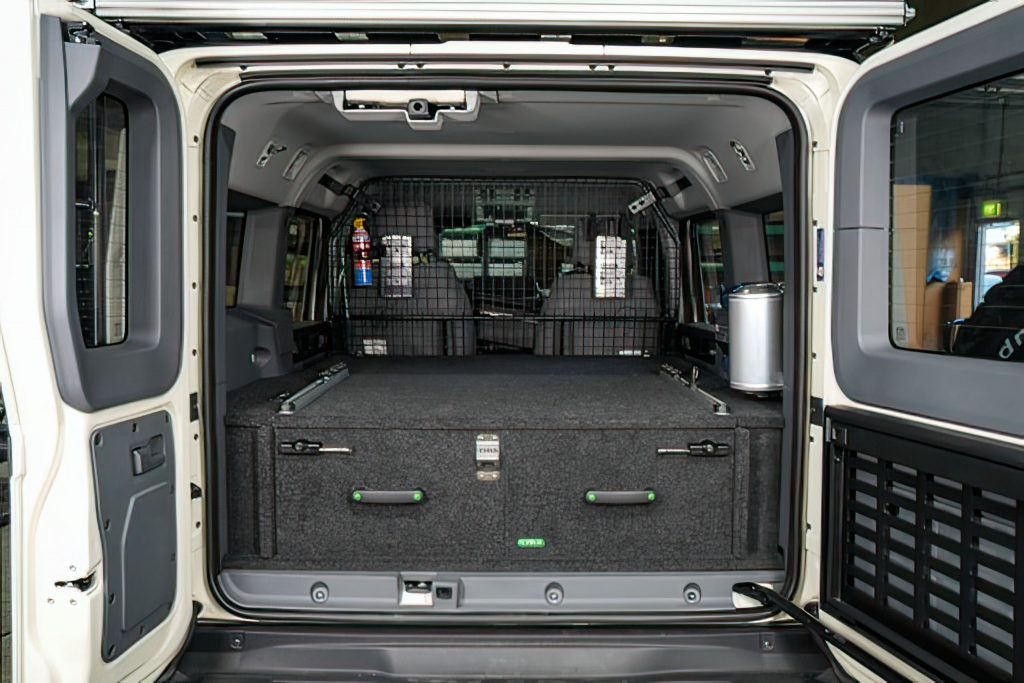
1. The Doc and his brother installed the rear roof shelf over the weekend and The Doc has been experimenting how to pack the shelf. At present, he is using it to store the Solar Screens, air compressor equipment, Nakatanenga rear Door Air Vents and the Blacksmith Camping firewood carrier. Minimal loss of rear vision due to the shelf.

Here is a photo – the Travel Buddy Oven will be installed on the left side under the shelf after The Doc fits the Anderson plug to the oven.

2. The bed extension is removed while ORS makes some refinements to the design. It did allow me to easily fit the BLE Battery Monitor to the main battery today.

3. The Bushman Fridge arrived for the Grenadier and The Doc gave the courier a guided tour of the car. 🙂

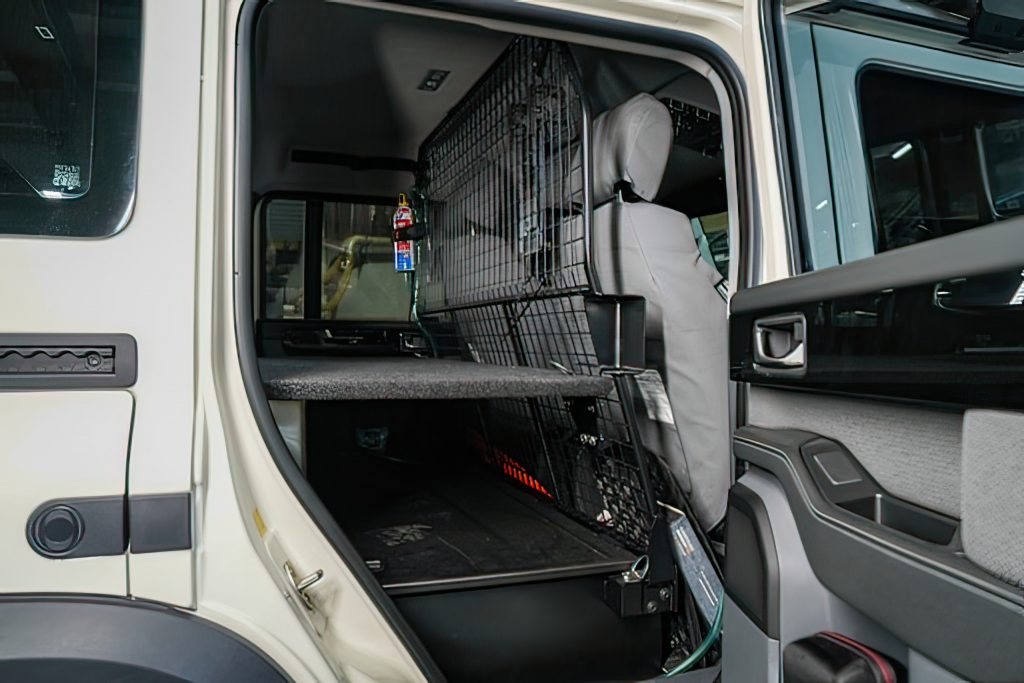
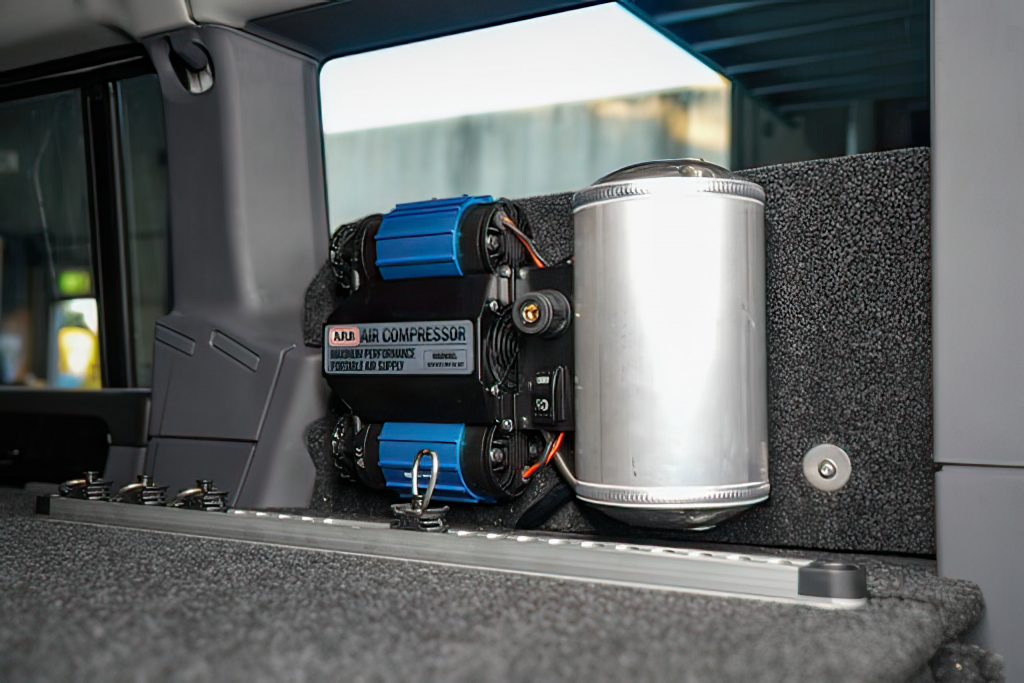
4. The Doc installed the rear Firestryker extinguisher next to the air compressor cylinder. Brian from ORS suggested the location; and I thought it was a good suggestion, so I used it. You can see the air compressor bracket created a little space between it and the window that I can use for storage. Still working out what to put there. In the image there is a red Drifta Power Towel Dispenser and the other canvas bag has a 240 volt extension cable. When camping I can hang the Drifta towel dispenser from the roof shelf. That worked out nicely! Finally, the tie down rings will be re-installed where you see the bolt and washer on the bracket, so I can use the raised tie down points on both sides of the car.

Image from Drifta website.

Grenadier – Travel Buddy Oven

TRAVEL BUDDY OVEN
Tasks today:
1. Wired the 50-amp Anderson plug to the Travel Buddy Oven. Fitted the KAON insulated door to the oven.
2. Fitted the KAON Travel Buddy mounting brackets to the rear roof shelf. The backing plates had been wrapped in black fabric tape to stop any rattles and let the backing plates blend into the shelf.
3. Fitted the Travel Buddy oven to the KAON brackets.
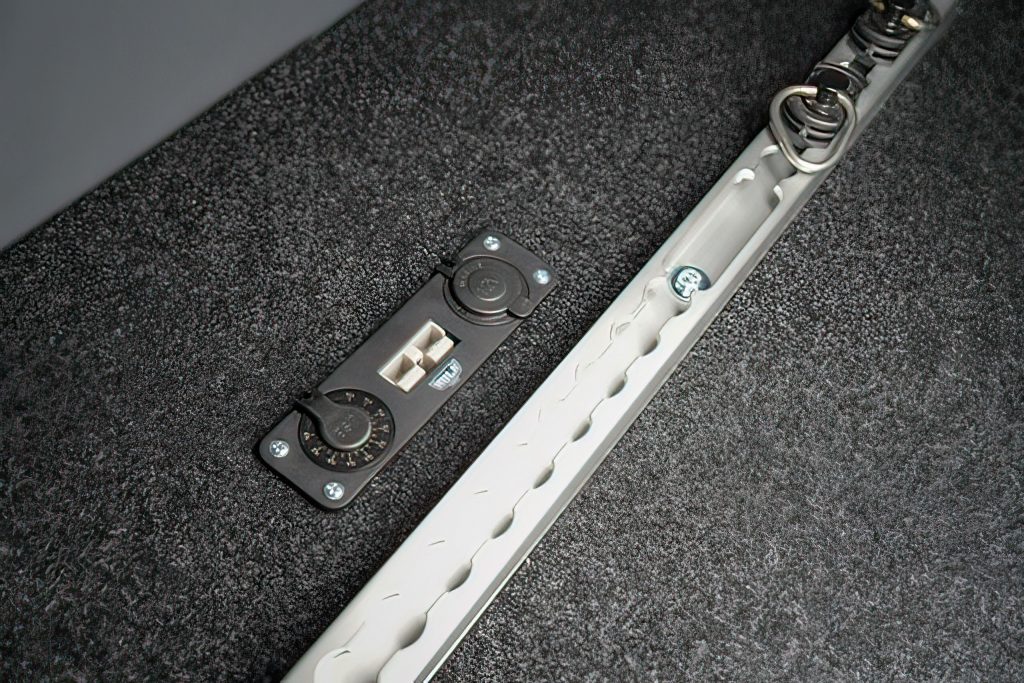
4. Plugged in and tested the oven – all working! The oven can be plugged into the rear power outlet shown below.
5. Placed spit tubing over the power cable to protect it, then tidied up the run of the power cable to the power outlet. When not in use, the Anderson plug is velcroed to the roof shelf.
6. After fitting the Travel Buddy, the driver loses some rear vision, but it is limited to part of the small rear door on the passenger’s side (RHD).

POWER TO THE CAR TRACKER
7. Used my rear power outlet to recharge the car tracker battery, which normally lasts around 6 months. Worked out how to lay permanent power to the tracker, if needed.

REAR JACK
8. Removed the jack and stowed it in the rear drawer. The jack keeps working loose.

The build is coming together nicely now.

TRAVEL BUDDY NOT PART OF THE ORIGINAL BUILD
The Travel Buddy was never part of the build, until The Doc fitted the rear roof shelf and thought of this upgrade. It offers some great options when driving around for better meals. When driving long stints The Doc tends to eat take away, now he can cook my own food.

TO DO
Building the fridge slide is the next to do. After that a visit to Expedition HQ for the final work and then off the remote Channel Country in South West Queensland and the dinosaurs in June.

MAYBES
Rocks sliders/steps and maybe a small front LED lightbar on the Roo bar. Still thinking about a Redarc EGT and Boost gauge as well.

UPDATE
The Doc just did a short trip with an empty oven on. The Doc will place some insulation over the top of the oven, between the oven and the roof shelf. He wants to minimize heat transfer to the shelf. He is glad he did this test before using the oven in anger for 2-3 hours, there was more heat and heat transfer than he was expecting.

The Doc thinks over time the heat transfer to the shelf needs to be monitored. Reminded once again why The Doc does a shake down test after an install. A few tweaks and she will be good to go.

Grenadier – ORS fitout

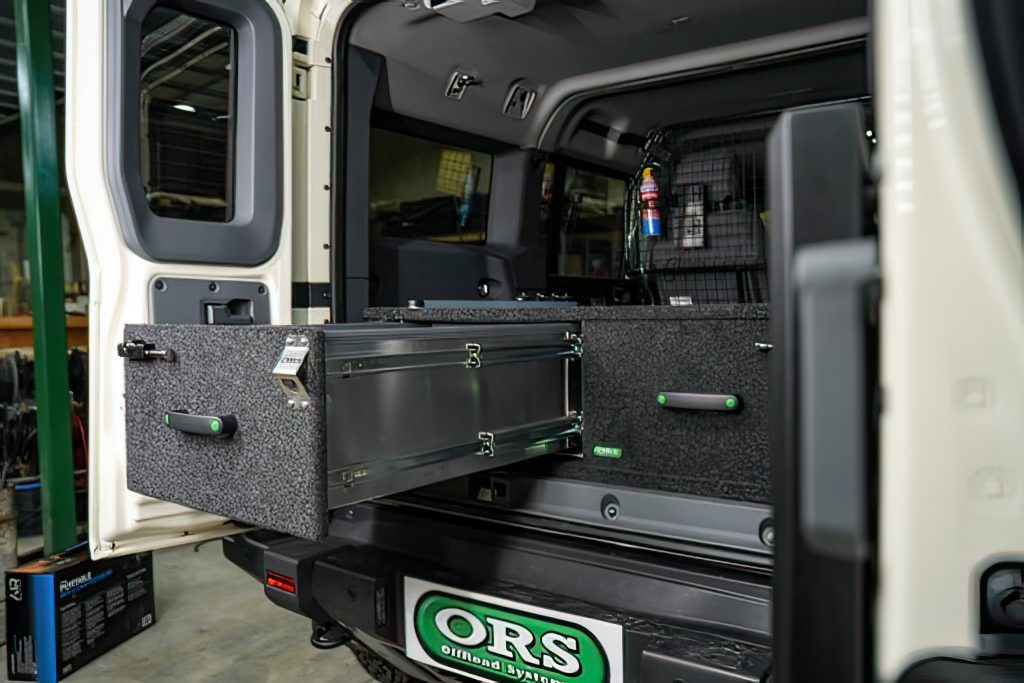
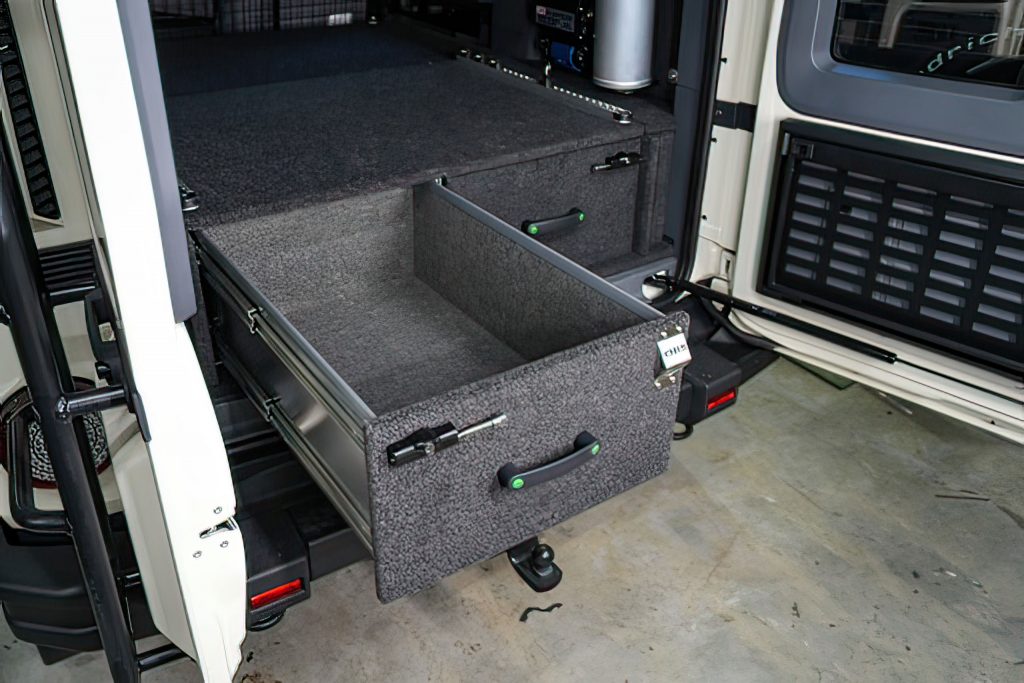
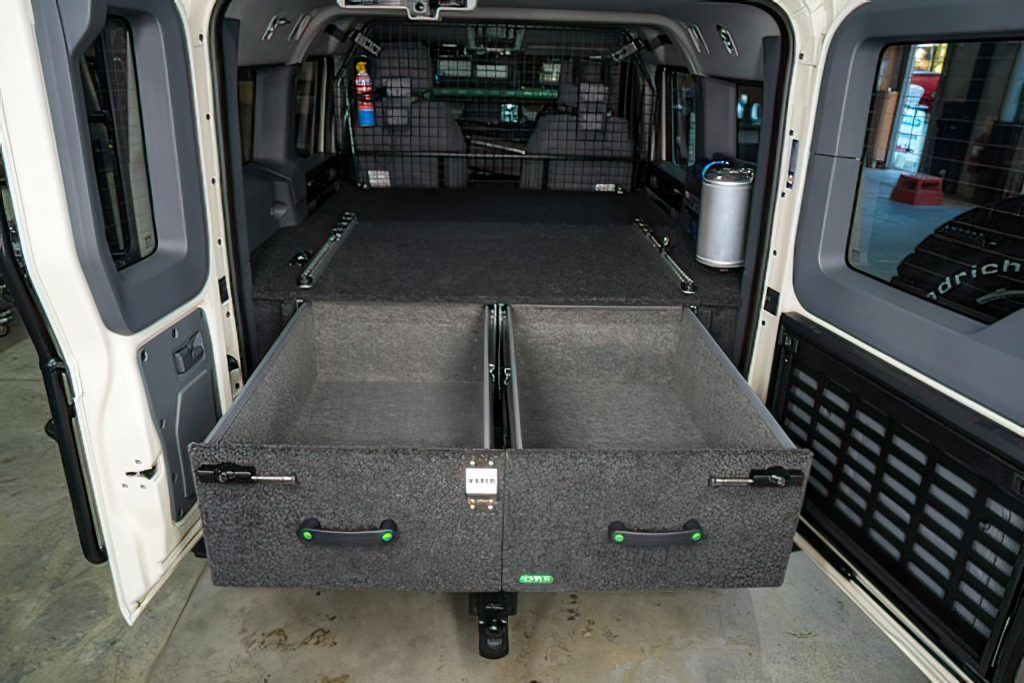
Offroad Systems (ORS) twin drawers, water tank, bed extension and ARB twin compressor are now installed.

The Doc wanted air flow around his compressor, so it was mounted on brackets over the driver’s side rear wheel arch. Trivia: there is a global shortage of twin ARB air compressors due to a surge in demand. ORS sourced the Portable Twin compressor and mounted that to the bracket over the wheel arch. That is why it looks so much like a twin portable compressor – because it is one. The compressor’s power cable was attached to the Grenadier’s spare stud on the 5 stud busbar (the supplied cable was not long enough to reach the spare on the 7 stud busbar). I sourced an 80 amp ZCase fuse, as the ARB has twin 40 amp MAXI blade fuses. The Sparky cut off the two MAXI fuses and ran the cables straight to the80 amp ZCase fuse.

Globalgregors inspired The Doc to add the bottle top opener on the drawers and go for a deeper drawer than originally planned, after he saw their finished setup.

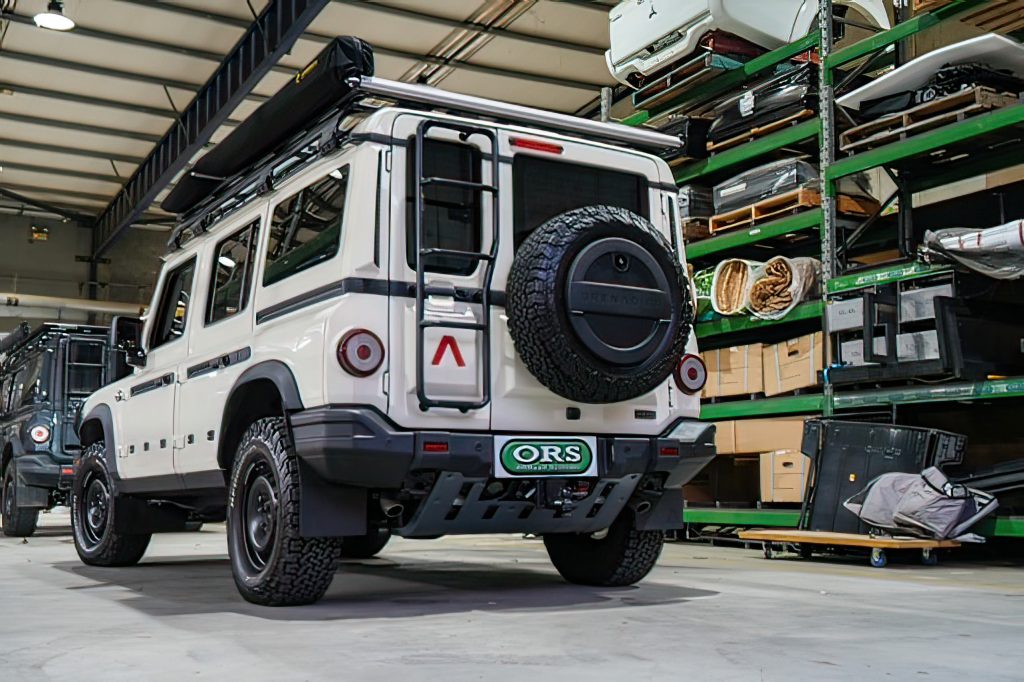
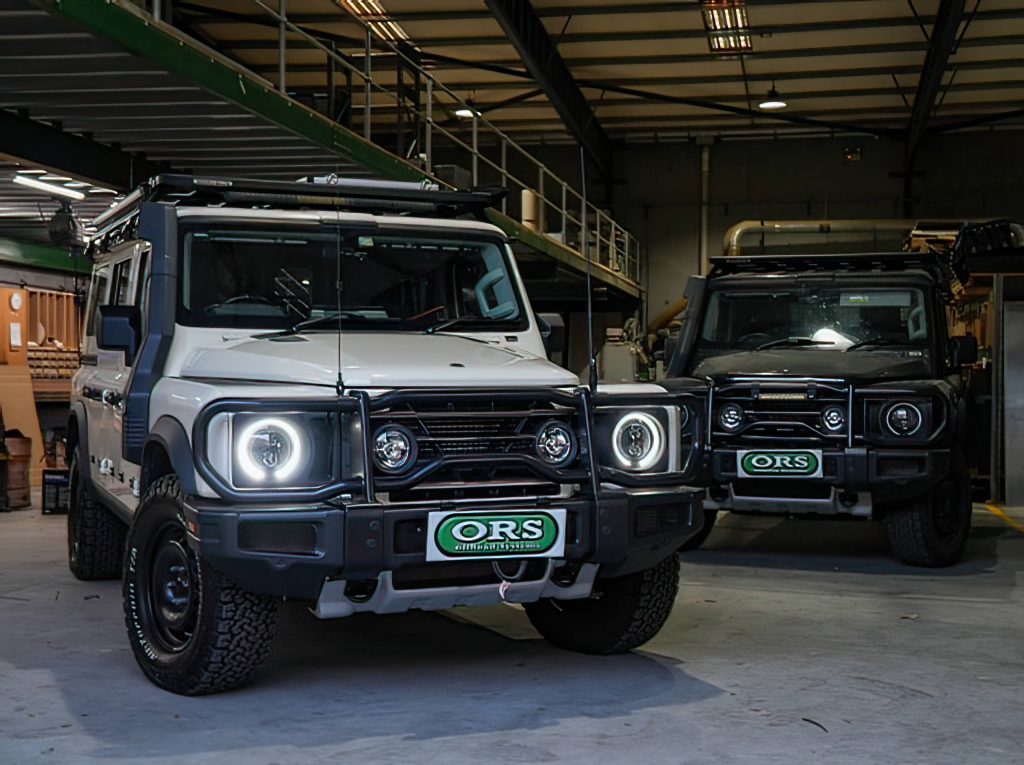
There was another INEOS in simultaneously getting work down, and ORS asked if they could keep The Doc’s car an extra day and have their Pro Photographer take pictures of both (see some of those images below).

The rear roof shelf has been installed and will be covered in the next update.

12 volt car fuses–buy quality fuses–avoid Cheap Chinese Crap

In short, Cheap Chinese Crap (CCC) blade fuses are unsafe to use.

Just like Anderson plugs, which The Doc discussed here, blade fuses have been overrun by Cheap Chinese Crap. Avoid buying Cheap Chinese Crap, it can be a matter of life and death.

CCC blade fuses are commonly sold on eBay and Amazon. There is a reason why they sell fuses for a few cents each and quality fuses can cost a $1 or more. CCC fuses do not work properly, and they pose a real danger to those who use them. They are unsafe to use.

Fuses, to be safe and effective, need to be built to a specification and certified to perform in accordance with that specification. Cheap Chinese Crap doesn’t. In the case of a catastrophic fuse failure your car can catch fire and be burnt to the ground or you can be injured/killed or have your expensive equipment destroyed. While catastrophic failures are rare, you do not want to be the unlucky one, when it can be avoided.

Saving a few dollars buying CCC fuses is not worth it. If a CCC fuse damages a car’s wiring loom, the repair bill can run into 1,000s of dollars.

Problems created by CCC fuses

Poorly made fuses can have one of more of the following problems:

  1. incorrect manufacturing tolerances, so the fuse does not fit properly in the fuse holder. Poor contacts can mean your device will not work or it create shorts, and in worse cases scenarios fires;
  2. not meeting the rated performance specification. For example, a fuse rated at 5 amps does not blow until 12.5 amps; way beyond the specification, risking fire and damage/destruction of the device the fuse is supposed to protect. Here is an eye opening video, where CCC fuses do not work as rated: https://youtu.be/bVKuYOA3F2E
  3. use of inferior materials, meaning the CCC fuses may melt and catch fire. Another eye opening video here were CCC fuses, when they blow, often melt the plastic fuse cover: https://youtu.be/tDuJx1qciBg

Both videos show how dangerous these CCC fuses can be. Minimise your risks, avoid Cheap Chinese Crap.

What to buy

Buy fuses which are certified to perform to specification and have a rating marked in white on the back of the fuse (5, 7.5, 10, 15, 20 amps, etc). So only buy fuses with the white rating from a reliable dealer. Do not use fuses which do not have the rating painted in white. All the fuses in The Doc’s car have these rated the fuses from factory. Car makers understand the importance of rated fuses and use high quality fuses when making the car. You should do the same.

Quality rated fuses are made by LittleFuse,, PEC, Jeng Feng (Taiwan), Bussmann (who source from PEC and JF) or Prolec. The Doc buys his fuses online from Swe-Check, a fuse specialist. Quality fuses normally come with a specification sheet.

The Doc was not always so informed and has wasted money on CCC fuses (now happily thrown in the garbage, with a lesson learned). This post is to stop you making the same mistake. While this post concerns blade fuses in cars, the main points apply to other CCC fuses. Avoid them.

Tip: all components in a car’s 12 volt electrical system should be good quality, Australian made copper wire, tin-plated copper (not brass) crimp terminals, genuine Anderson plugs (not Anderson style plugs), quality certified fuses (not CCC), etc.

Even more information here and here.

Aussie made 11 to 15

4X4 Equipment

Aussie Made No 11: Enerdive are based in Queensland. While some products are sourced from overseas, Enerdrive does manufacture its own range of ePOWER AC battery chargers & DC2DC battery chargers along with their Lithium battery systems: https://enerdrive.com.au/

Aussie Made No 12: Austech Wire & Cable make copper cables for automotive, marine, speakers, irrigation, etc.  Automotive cables are sold at retail under the name Owl or Wise Owl on eBay: https://austechwire.com.au/#about

Aussie Made No 13: Tycab Australia’s cable products are used across a broad range of industries, from Automotive, Irrigation, Building, Data & Instrumentation to Security, Marine, Welding, Speaker & Audio and Switchboards. I have used their automotive cables and they are world class: https://www.tycab.com.au/

Aussie Made No 14: SmartBar was the original lightweight plastic bullbar built to absorb an impact and bounce back into shape. They are much more pedestrian friendly in an accident. I have one installed on the Patrol. There is a variety of bars now called SmartBar, StealthBar and SpartanBar: https://smartbar.com.au/

Aussie Made No 15: Rhino Rack makes a vast array of roof racks and accessories right here in Australia. The Patrol has a Pioneer Platform fitted with jerry can holder and spare tyre carrier: https://www.rhinorack.com.au/en-au

Guide on terminal crimping (cars, marine, RVs & caravans)

Background – learning the hard way

The Doc had an issue with the passenger’s side blinker on the Nissan Patrol not working properly and had to redo the crimps. That is when the problems started. He bought the crimps from SuperCheapAuto, which in small qualities are very expensive. He was crimping the terminals using pliers and the results were poor: wires slipped out of the terminals, the terminals were flattened rather than crimped and the end result was not weather sealed. The Patrol does water crossings so weather sealing is a must have.

Frustrated with substandard results, The Doc went to YouTube and stumbled on a crimping guide from EricTheCarGuy. The video is fantastic. Taking onboard Eric’s advice to buy the right tools The Doc bought a self-adjusting wire strippers, a racketing crimper, shrink tube and redid the job like a pro! Thanks Eric.

The Doc then moved to the Patrol’s driver’s side and redid those crimps. The crimps now look better than factory. No issues with these crimps over the last 3 years.

The Doc just carried on crimping. Over the last few years, The Doc has learned more and identified a few pitfalls.

Types of crimp terminals

If you are in a hurry to crimp, go down to the heading Crimping tips.

This Guide is about crimp terminals commonly used for automotive, marine and caravan use. Common terminals include spade, bullet, ring, fork and butt splice terminals. Spade and bullet terminals have a male and female counterpart. Ring and fork connectors are used with bolts or battery terminals and are often held in place with a tightened nut. Butt slice terminals join two pieces of wire.

There are many other crimps including T-tap connectors, flag terminals, Piggy Back terminals, Deutsch connectors, etc. which will not be discussed.

Terminal sizing

Terminals commonly come in three sizes red (AWG22-16), blue (AWG16-14) and yellow (AWG12-10). Or small (red), medium (blue) and large (yellow). AWG stands for American Wire Gauge.

With AWG ratings, the higher the number, the smaller the wire diameter. Red terminals handle wire 0.5 to 1.5mm in diameter, blue 1.5-2.5mm and yellow 4-6mm.

Insulated verse non-insulated terminals

Crimp terminals often come in two broad varieties:

  1. insulated; and
  2. non-insulated.

Insulated terminals have plastic or some other insulator on the hollow end of the terminal. Non-insulated terminals do not. This Guide focuses on insulated terminals. A non-insulated terminal can be insulated by using shrink tube. Shrink tube can be single or dual wall (see below).

Tip: the dye used in a racketing crimper will vary depending on whether the terminal is insulated or non-insulated. Ensure you use the right dye (a dye is the set of jaws used to complete the crimp).

Most terminals over AWG12-10 are non-insulated and are known as “copper cable lugs.” You insulate these lugs after they have been crimped, using single or dual wall shrink tube. Tip: silver lugs are commonly tin-plated copper, to help reduce corrosion. A copper cable lug looks like this:

 Types of shrink tube

There are two types of shrink tube:

  1. single wall; and
  2. dual wall.

Single wall shrink tubing is just a plastic tube, which shrinks when heat is applied. The tube will say 2: 1 or more commonly 3:1. Which means when heat is applied the tube will shrink to one-third if its original size, 2:1 shrink tubing reduces to half its original size.

Dual wall shrink tube has an outer plastic wall and an inner wall of glue (polyolefin). When applying heat, the plastic shrinks and the glue melts to form a good seal. When done correctly, the seal will not only be insulated but also waterproof and dustproof. It is the obvious choice for marine use. Tip: dual wall crimp terminals may be called adhesive lined terminals.

Once heat treated single wall shrink tubing is more flexible than the dual wall shrink tube (because of the layer of glue in the dual wall shrink tube). Only dual wall shrink tubing gives you a waterproof seal. Tip: the cheapest way to buy tubing is to purchase dual wall clear, then the tubing can be used with any colour wire. Otherwise you need matching colours for a variety of wire diameters, which will cost more.

Apply even heat

Use an electric/butane heat gun to shrink the tubing and melt the glue. The Doc applies heat until he can see the crimp seal onto the wire and a little glue comes out of each end of the tubing (see video here). Tip: apply the heat evenly over the shrink tube.

Lighters and matches are not ideal heat sources as they do not apply heat evenly. The Doc uses an old heat gun intended to peel paint. In the field, he takes a Dremel VersaTip, an all in one soldering iron, heat gun and sealing tool. He also uses it to make his own bootlaces!

Buy quality terminals, wire & shrink tube

Using quality terminals, copper wire, shrink tube and a good crimping technique are all important to ensuring reliable current flow in your electrical system (and minimise any risk of fire). The Doc buys quality terminals (Taiwanese where possible) and Australian made Wise Owl (made by Austech Wire & Cable) or Tycab copper wire – often from PX Wholesales, Connector Tech ALS, Tinker Wholesale, Autoelec or Brillante Sales. For marine use buy tin plated copper wire.

Cheap Chinese rubbish on eBay just causes problems. The Doc says do it once and do it right.

Excellent quality dual wall shrink tube is bought from Rhino Tools and some single wall shrink tubing from eBay. Tip: buy clear tubing if the crimp needs to be inspected.

Cheap crimps, poor crimping technique, crappy copper wire (the wrong size or low quality) and loose fittings all adversely affect your ability to charge and discharge your battery properly. More here.

What crimps to buy

The Doc started by using the older style insulated crimps that have plain plastic insulation; they look like this:

The Doc bought a 540 piece kit from eBay for under $50. Tip: buying small quantities of terminals can be very, very expensive from places like SuperCheapAuto (like $16 for twenty bullet terminals).

Doing more research, The Doc discovered terminals with dual wall tubing, giving waterproof connections if sealed correctly. After more work he bought a 540 piece Wirefy terminal kit. The metal terminals were of good quality (tin coated copper), with quality dual wall insulation and a good variety of terminals in different sizes. He also bought quality butt splices from Rhino Tools. The Wirefy insulated crimps look like this:

Buying the larger size kits like the 540 piece Wirefy saves money. The Doc divided the terminals between himself, his brother and nephew – we all get a selection and a big cost saving.

Wirefy must be bought overseas and with the exchange rate dropping Wirefy are now expensive. Wirefy terminals are tin coated copper, rather than the cheaper and less conductive tin coated brass. The Doc did find a reasonable equivalent on eBay here (they are not as good as the Wirefy). Warning: The prices on Amazon and eBay over the last twelve months has risen around 60%.

The Doc’s first choice for most jobs are the Wirefy or Rhino terminals and the older style are often used for practice crimps. Dual wall terminals are more expensive, but if the budget does not stretch you can still get great results with older style terminals sealed with quality dual wall shrink tubing.

Warning: over time the unsealed older style terminals permit corrosion around the terminal and wire. The Doc has replaced older terminals on the Nissan Patrol because of this, with newer sealed terminals.

If you need commercial grade crimp terminals look at Parnell’s website. They have a mind-numbing assortment of crimps. If you have very precise terminals needs ozautoelectrics can help, but often at a high price.

The right tools

You will need:

  1. wire strippers to remove the insulation from around the wire;
  2. a racketing crimping tool to make the crimp; and
  3. a heat source to shrink the tubing.

Wire stripper

The best stripper for the DYIer is probably the Irwin Vise-Grip 2078300 Self-Adjusting Wire Stripper, costing around $30 in Australia. Cheaper crimpers look like the Irwin, but many are of poor quality. A quality wire stripper better than the Irwin is the Klein Tools 11063W Katapult Wire Stripper, costing around $45.

Self-adjusting wire strippers do an excellent job, but both the Irwin and the Klein Tools stripper struggle with thicker wire diameters (like 6B&S and 8B&S). Both will strip the insulation, but the cut is not clean as the insulation is torn.

When using a wire stripper, you must avoid:

  1. nicked strands of wire;
  2. cut strands of wire;
  3. cutting strands at an angle; and
  4. torn or tapered insulation.

Tip: The Doc bought a $10 co-axial cable stripper off eBay for thicker wire. Using the single adjustable blade, he scores the insulation without cutting into the copper wire, then he uses the Irwin to finish the job. It gives a much cleaner result than using the Irwin alone. Warning: if you cut too deep into the insulation while scoring you risk cutting or nicking the copper wire, hence the two-step process. The $10 co-axial cable stripper looks like this:

 Crimping tool

The Doc uses a Sherman S&G Tool Aid 18960 Quick-Change Ratcheting crimper, see here. It has several quick-change dyes for different terminals. It is easy to use and completes excellent crimps. The Doc bought his on Amazon US but it is getting hard to source it lately.

Rhino Tools based in Australia has another great choice. You can just buy the crimper and then purchase the dyes you need. There was a choice of 25 dyes last time The Doc counted, see here.

The Doc has used Rhino Tools several times, they offer quality products at a competitive price. You save time and money because Rhino only sell quality crimpers, terminals and dual wall tube.

Anderson plug crimper

You need more leverage to crimp the larger copper cable lugs and the lugs in an Anderson plug. The Doc uses the 1.5-16mm OPT Crimper for those. The Doc does enough crimping of these larger lugs to justify the purchase. The occasional crimp can be handled by the S&G Tool Aid 18960. Tip: see The Doc’s Guide on Anderson Plugs here.

Bootlace ferrules

There are special considerations when crimping with thinner wires, like those used to wire up a box trailer. When the insulation is stripped, the wire is so thin it can be damaged when securing it in the trailer plug. The screw flattens the wire out and damages it. Using a bootlace ferrule around the wire before it is screwed down helps greatly.

There are insulated and uninsulated bootlace ferrules. An insulated bootlace ferrule looks like this:

 Use a hex crimper

Using a bootlace ferrule holds all the wires together and ensures a secure connection. Bootlace ferrule crimpers come in four or six sides. The six sided or hex crimper gives a better crimp as the four sided crushes the ferrule on the four corners.

Tip: hex crimpers are good up to 6mm diameter ferrules, any bigger and you will need a four sided crimper. If you have quick-change style crimper like the S&G Tool Aid 18960, see if a dye is suitable for bootlace ferules. The dye will crimp the bootlace ferrules differently to the four and six sided crimpers.

Making your own bootlaces

The Doc went to AliExpress and bought $50 worth of non-insulated bootlace ferrules (he already had insulated ones) and made his own bootlaces using paracord. Two pairs of OEM bootlaces including postage cost $45, so The Doc just bought some paracord and made his own for about $2 a pair (saving over $20 a pair). The savings paid for the ferrules and paracord rather quickly. The savings also paid for the bootlace ferrule crimper he already had and was using on thin wire.

Tip: if joining two wires of different sizes the bootlace ferrule can increase wire diameter of the smaller wire to ensure a proper fit into the butt slice terminal. You can also use paracord and ferrules to hang pictures on the wall – a ferrule secures each end of the looped paracord. The Doc and his brother like to find new ways to use paracord and ferrules.

Trivia: uninsulated metal bootlace ferrules were originally used on shoe and boot laces, before the newer style plastic crimps came into use. Which is why these terminals are called bootlace ferrules.

Solder the crimped terminal – Yes or No?

The Doc has found a good crimp sealed with dual wall tubing works for Outback travel. Australia’s notorious corrugations can break solder. Good crimps last longer than solder. Decide what works for you.

Trivia: the military standard requires both soldering, crimping and some fancy wire twisting.

Crimping tips

Some suggestions on getting good crimps:

  1. Buy quality terminals like the Wirefy or Rhino Tools. Your wire should be suitable for the intended job. Ensure the terminal and wire can carry the desired voltage and amps, otherwise there is a fire risk.
  2. Purchase a good wire stripper like the Irwin Vise-Grip 2078300 Self-Adjusting Wire Stripper or the Klein Tools 11063W Katapult Wire Stripper.
  3. Purchase a Ratcheting Terminal Crimper. If you want a variety of dyes for different jobs look at the SG Tool Aid SGT18980 Ratcheting Terminal Crimping Kit. This is the most versatile crimper The Doc has seen and used.
  4. Strip the insulation from the wire to the correct length with the wire stripper (note how much quicker, easier and better the wire stripper is compared to a pair of pliers). Tip: the bare wire should fit all the way into the terminal with minimal bare wire exposed. Adjust as necessary.
  5. Match the terminal to the wire thickness (important for good crimps). Tip: make sure the terminal chosen also fits were you need it.
  6. Slip the shrink tubing over the wire before crimping the terminal. The tubing will be heat treated later. Tip: you do not need shrink tubing if it is already part of the terminal you have.
  7. Red tubing is used for positive wires and black for negative. Clear tubing and other colours are also available. Warning: do not use red tubing for negative or black tubing for positive wires as it leds to confusion.
  8. Place the terminal in the correct dye in the crimping tool. The Doc gently close the crimper to lock the dye onto the terminal but without compressing the terminal, then The Doc inserts the wire into the terminal and compresses the crimping tool. Tip: using the correct size dye and placing the terminal correctly into the dye is important.
  9. Terminals often have a split in the top, the male part of the dye should compress down on the split to ensure a good crimp. The female side of the dye will not properly compress the split down onto the terminal base.
  10. A ratcheting crimper applies the correct pressure to ensure a great crimp. Once it is properly crimped the jaws automatically open. For a manual crimp you need to ensure enough pressure has been applied (you need to apply enough but not too much pressure – hence my strong suggestion of using a racketing crimper!). Tip: sometimes you need two hands to apply enough pressure, but ensure the wire does not move out of position.
  11. Put the shrink tubing over the wire and the terminal to waterproof the join. Use an electric/butane heat gun to shrink the plastic cover and melt the glue. The Doc applies heat until he can see the crimp seal onto the wire and a little glue comes out of each end of the tubing. Wirefy and some Rhino Tools terminals are translucent so you can see through the plastic to inspect the seal. Tip: ensure any shrink tubing does not cover the contact surface of the terminal – which is where the terminal mates with the matching terminal.
  12. Let it cool.
  13. Test the crimp by holding the terminal in one hand and firmly pulling on the wire with the other. Do not jerk or over stress the wire.
  14. Job done.
  15. Common mistakes when crimping:
    • not matching the wire size to the crimp terminal;
    • not using the correct dye for a given terminal type;
    • not correctly placing the crimp terminal in the dye jaws;
    • forgetting to put on tubing before crimping the terminal; and
    • not applying heat evenly to the shrink tubing.
  16. Practice is important. Develop an excellent technique before using crimps in real life. The Doc has old style terminals and old wire and practices his crimping technique before doing a job. Test using both single and dual wall tubing and see for yourself the differences in flexibility discussed above.

The initial cost of the tools can be expensive, but they will give you a lifetime of service. One job The Doc did on his car, meant the tools paid for themselves. The Doc’s nephew worked on his Hilux and saved around $2,000 in labour costs wiring up a solar panel, dual battery system, multiple lights, etc. That is a lot on money saved because he had the right tools and crimp terminals. He has probably used more of The Doc’s crimps than The Doc has!

Crimping poverty pack

If money is short or you want to minimise your spend, here is The Doc’s crimping poverty pack.

Equipment

Wire stripper: Irwin Vise-Grip 2078300 Self-Adjusting Wire Stripper. Must have.

Crimping Tool: Rhino Tools Automotive Crimping Set, then you could buy extra crimp dyes when needed. The Irwin Vise Grip has a basic manual crimper if your budget cannot stretch to a racketed crimper. A racketed crimper is worth the extra, they give professional grade crimps.

Heat source: any old heat gun can be used to shrink tube. If you do not have one, use as lighter or a heat source that will give even heat around 100C. The melting temperatures do vary between brands of tubing.

Crimps

Clear Dual Wall Shrink tubing: Taiwanese made is best. It can be used any coloured wire minimising your spend on tubing. Clear dual wall tubing is available at PSG.

Crimps: buy old style crimps off eBay, saving you money. Using dual wall shrink tube means you can seal the old style crimp. Personally, I would buy some Wirefy dual wall crimps, but that costs more. Tip: you can get good results with old style crimps and cheaper single wall shrink tubing, but the seals are not waterproof.