Category Archives: Aussie made

Grenadier build – ORS fitout

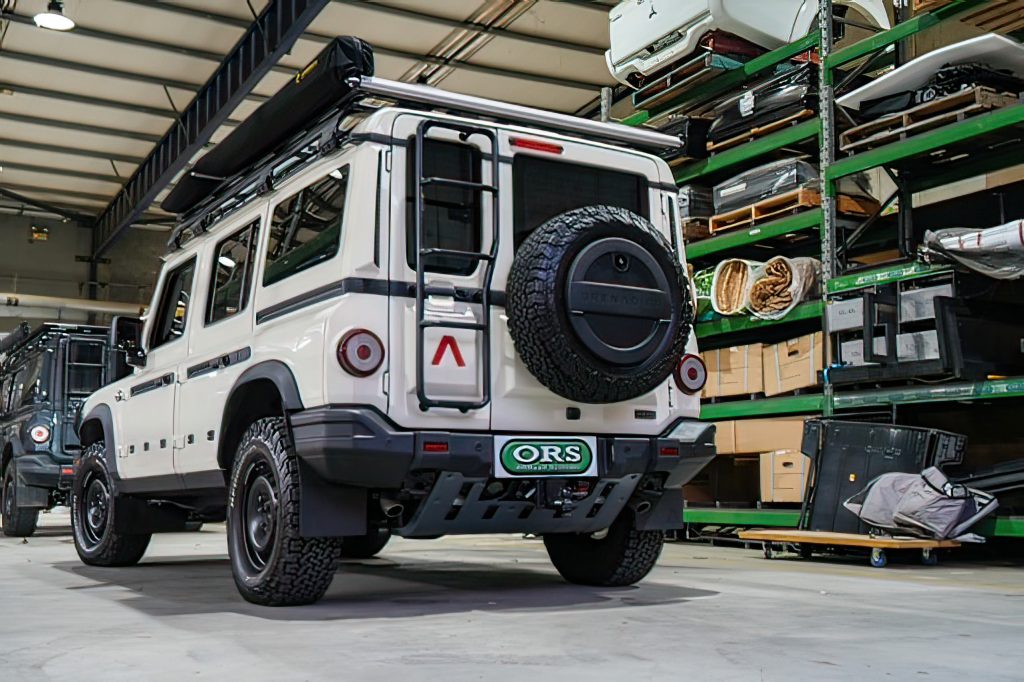
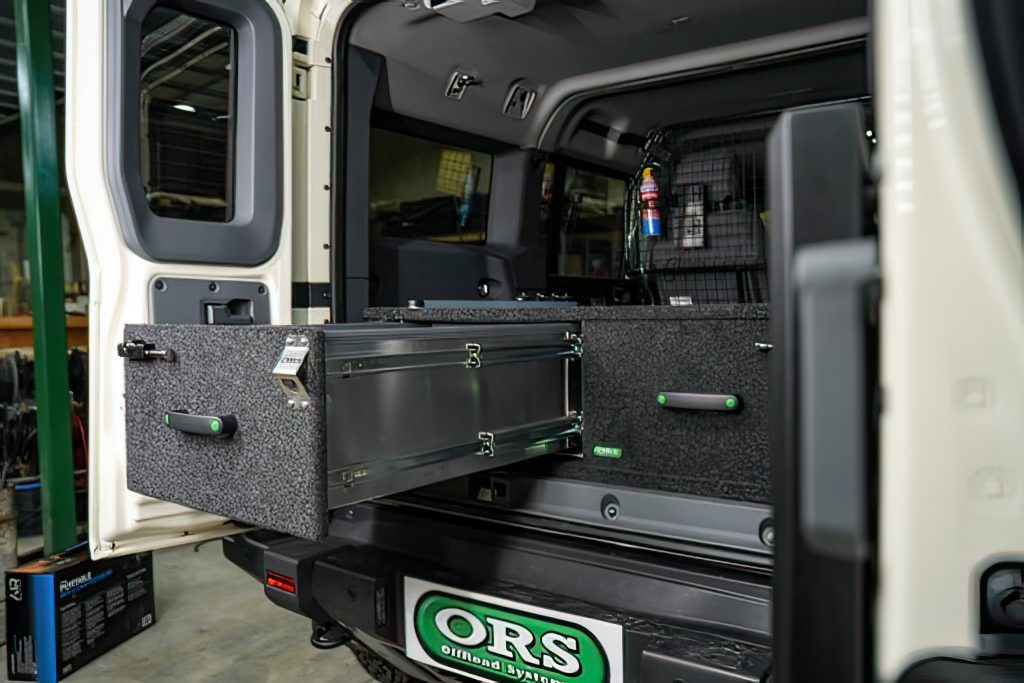
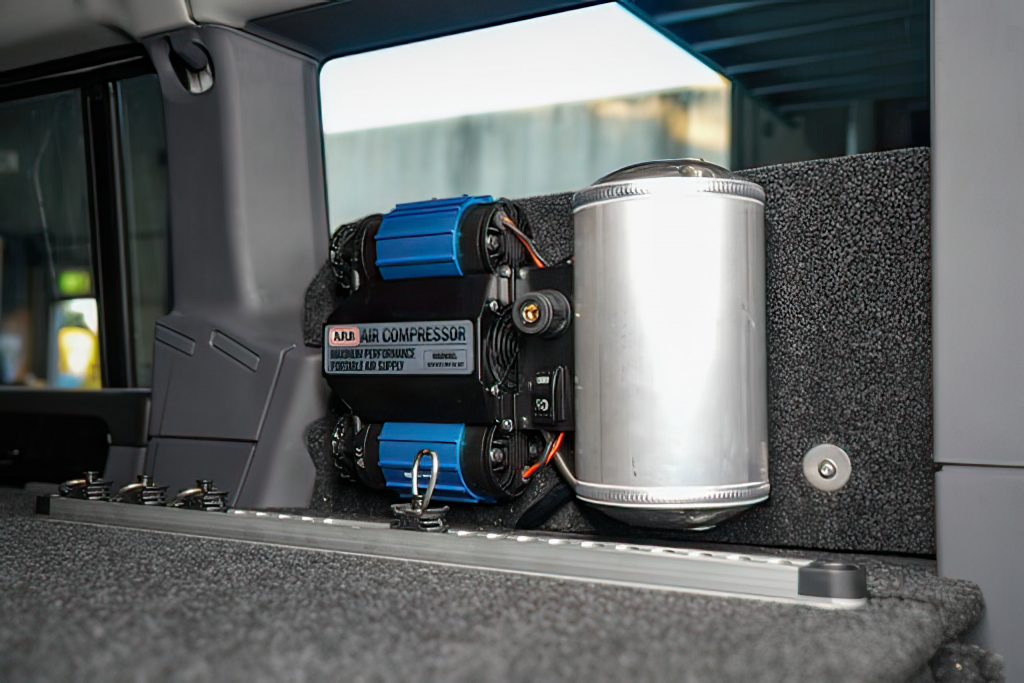
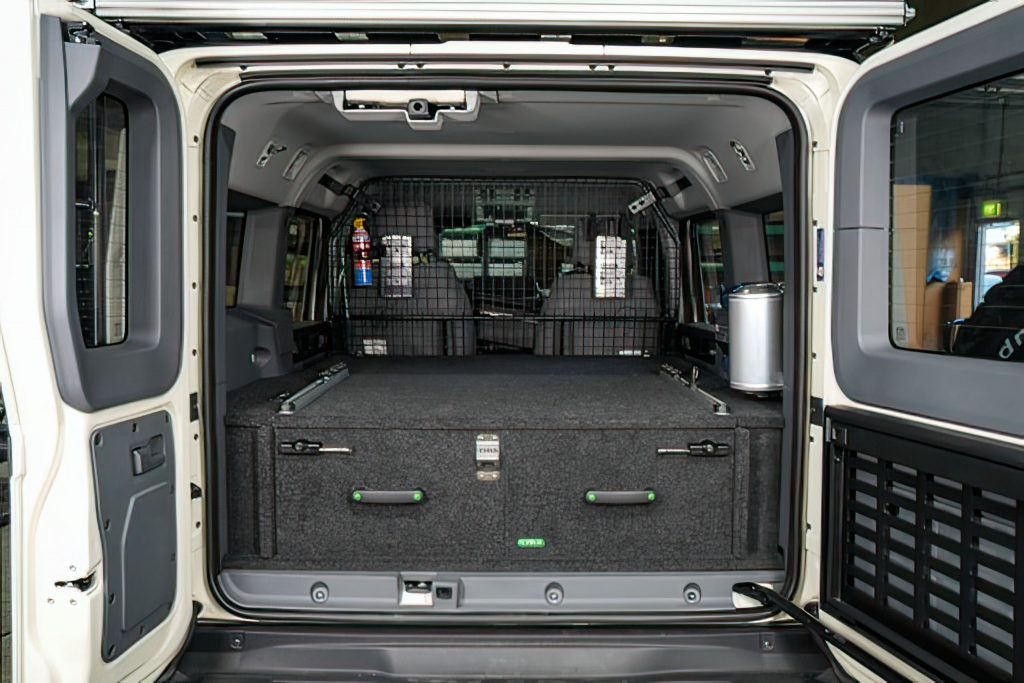
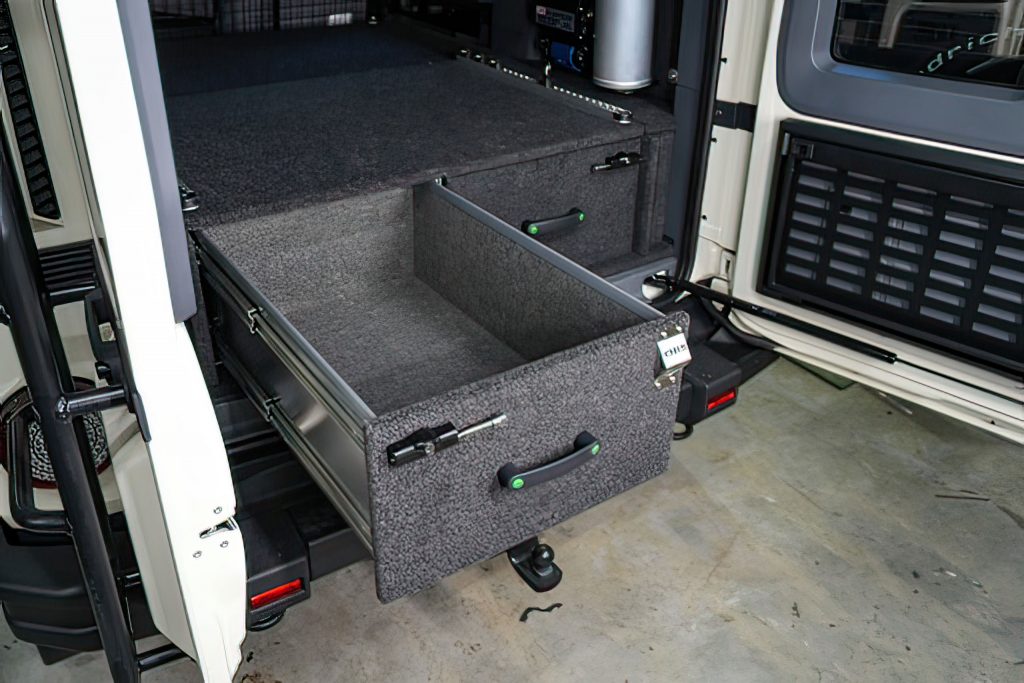
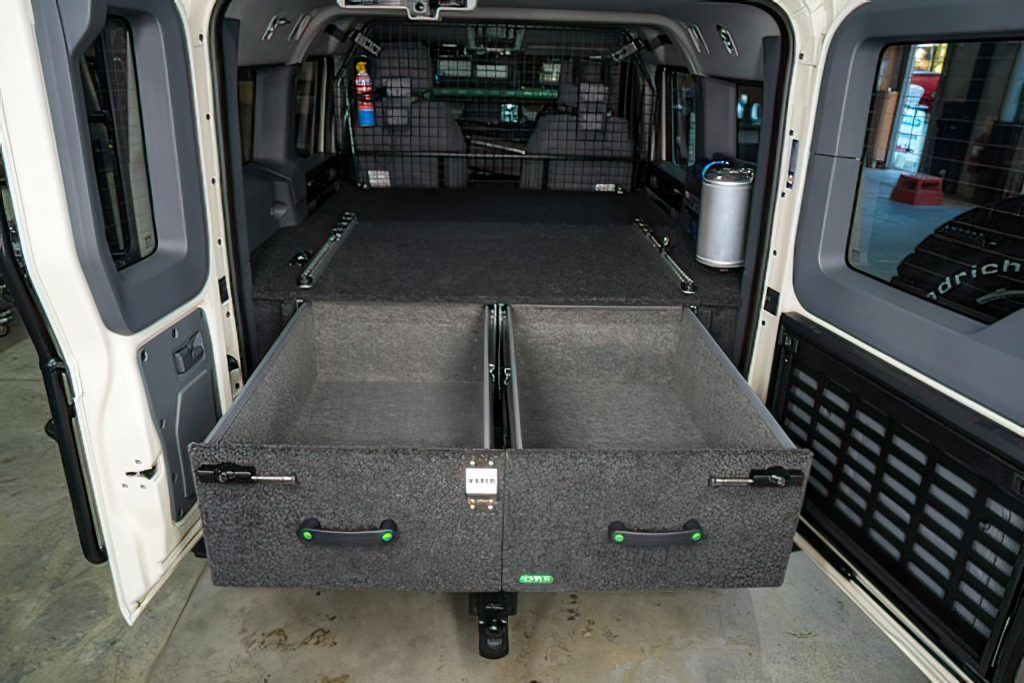
Offroad Systems (ORS) twin drawers, water tank, bed extension and ARB twin compressor are now installed.

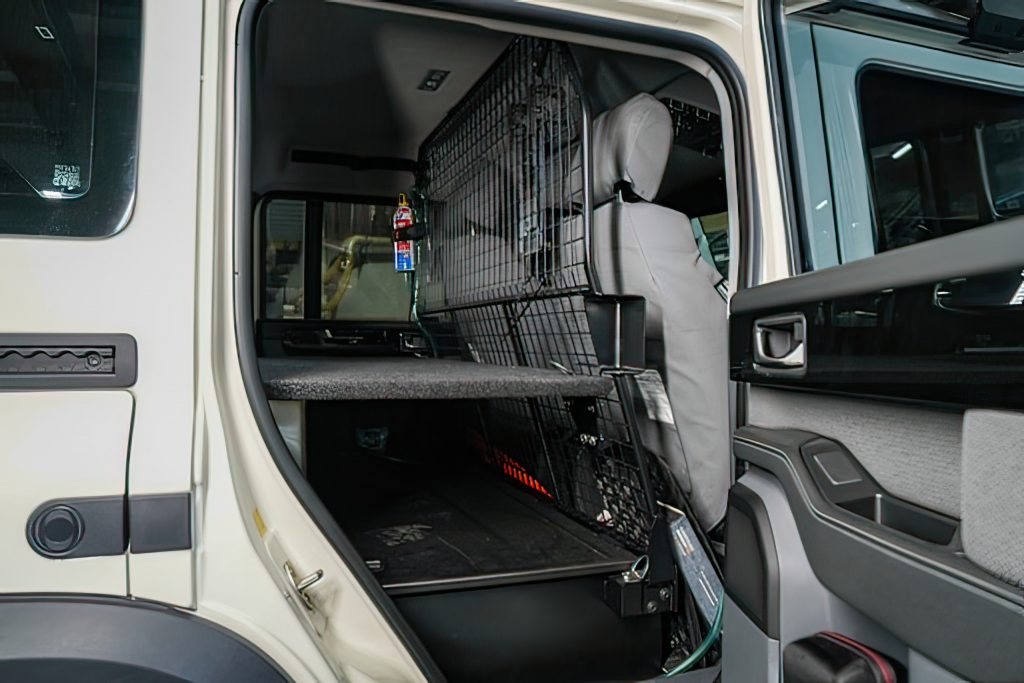
The Doc wanted air flow around his compressor, so it was mounted on brackets over the driver’s side rear wheel arch. Trivia: there is a global shortage of twin ARB air compressors due to a surge in demand. ORS sourced the Portable Twin compressor and mounted that to the bracket over the wheel arch. That is why it looks so much like a twin portable compressor – because it is one. The compressor’s power cable was attached to the Grenadier’s spare stud on the 5 stud busbar (the supplied cable was not long enough to reach the spare on the 7 stud busbar). I sourced an 80 amp ZCase fuse, as the ARB has twin 40 amp MAXI blade fuses. The Sparky cut off the two MAXI fuses and ran the cables straight to the80 amp ZCase fuse.

Globalgregors inspired The Doc to add the bottle top opener on the drawers and go for a deeper drawer than originally planned, after he saw their finished setup.

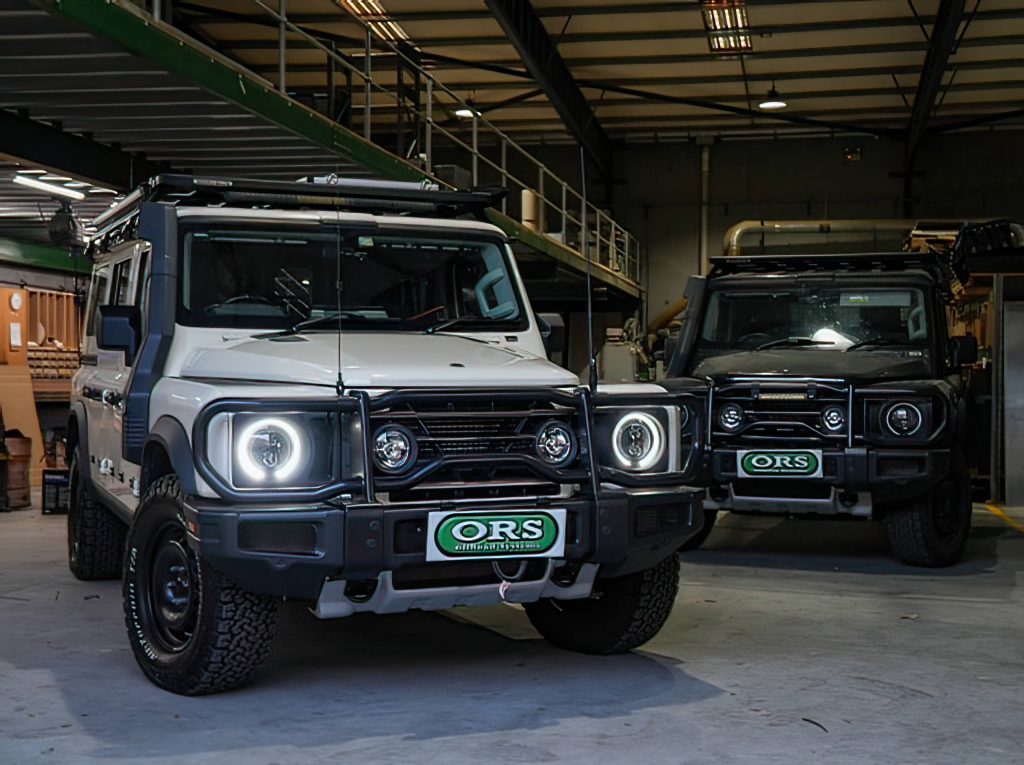
There was another INEOS in simultaneously getting work down, and ORS asked if they could keep The Doc’s car an extra day and have their Pro Photographer take pictures of both (see some of those images below).

The rear roof shelf has been installed and will be covered in the next update.

Grenadier – build trivia

Some fitout trivia:

  1. Aluminum drawers, not steel to save on weight;
  2. Double runners on drawers, as insurance against damage by corrugations (The Doc knows it works as my Patrol had the same for 12 years and it survived many, many corrugations);
  3. Removable bed extension, so anyone can access the battery box. Brackets on the cargo barrier for the bed extension, do not impede opening the battery box lid;
  4. Double drawers rather than a drawer/fridge slide combination, as The Doc mounts his fridge on the front passenger seat – not an option for most people;
  5. After seeing globalgregors Grenadier build, The Doc went for the deeper drawers, but the main reason was to give him more storage under the bed extension, an added benefit was more drawer space. Very happy with the results;
  6. The Doc may yet cut out part of the cargo barrier to allow him access to the rear between the two front seats;
  7. Drawer dividers not shown in the images, but they are important to have if the drawers are not full, to avoid things sliding all over the place. They just fit in where you place them;
  8. The vertical space to the battery box lid, is less than the vertical space to the seats in a 5-seater model;
  9. The stainless-steel water tank sits above and just behind the battery box. The tank sits in its own tray, that tray has drainage hoses to either side of the battery box, so any water leak does not spill onto the electrics in the battery box;
  10. The Doc did a lot of electrical work before the fitout, as the trim is now hard to remove in the rear (Dashcam, Anti Rust system wiring, Anderson plugs x 4 (including two solar plugs), Redarc TowPro, etc.);
  11. The water nozzle is gravity feed and accessible from the passenger door (RHD), but you can have a 12 volt version to some other location; and
  12. The Doc is pleased with the position of the twin air compressor. It was going to be wired to the spare stud on the 7-stud busbar, but the cable did not reach (the wiring cable length on the portable air compressor was already preset by ARB). We went to plan B, the spare stud on the 5-stud busbar as it was closer to the compressor. The Doc pointed out both options to ORS before we started (thank you INEOS for giving us this option). The twin compressor has two 40-amp circuits, so the wire ends in the battery box was not an option. Although they are fine for a single ARB compressor. The Doc bought an 80 amp ZCase MEGA fuse to use on the spare stud. The spare stud on the 7-stud busbar has a bolt, the spare on the 5-stud busbar does not (The Doc also sourced a bolt for the 5-stud busbar).

Grenadier build – drawers, wind and water

Images from the Offroad Systems fitout. Description of the fitout here.

Grenadier build – safety pole mounted


The Doc has mounted the Bushranger Safety Flag onto the Grenadier’s roof rack. You can vary the flags height, using 1, 2 or 3 fibreglass poles.

The Doc used a Razed antenna mounting bracket and attached the bottom of the flag pole onto the bracket (these 2 images are from the Razed website).

The nuts were torqued to 7Nm, and The Doc used Nord-Lock washers, instead of the supplied split washers, as Nord-Lock washers will not come loose due to corrugations. The Doc placed the bracket in a corner near the solar panel to minimise its drag profile. Final fit looks like this:

Grenadier build -Expedition HQ – Part 2

The Expedition HQ package replaces the 13 pin Euro plug with a 7/12 pin flat pin plug and 2 Anderson plugs (one for the caravan/trailer and one for the solar blanket). This is what the rear now looks like:

The XHQ package is not spliced into the INEOS electrics, but uses its own control box, shown here:

The fuse labelled Anderson, bottom centre, is for the two Anderson plugs for the fridge running off the AUX battery (see more below). The small circuit breaker top right (just below the AUX Battery label) is for the REDARC TowPro and the large 50 amp circuit breaker, to the left, is for the XHQ Control Unit.

The REDARC TowPro head unit is up under the dash near the steering wheel.

In a 5 seater Grenadier the XHQ Control Unit fits next to the CTEK 120S. The CTEK 250SE then fits on top of the XHQ Control Unit. There is not enough vertical room in the 2 seater for the CTEK 250SE to be mounted on top, so an alternate place was found, near the aux battery. The metal lid in the 2 seater leaves less room above the XHQ Control Box for the CTEK 25OSE than the seats in the 5 seater model.

In The Doc’s 2 seater the CTEK 250SE was mounted on a Black Sheep charger bracket he already had (the two solar Anderson plugs are attached the CTEK 250SE’s solar inputs. (The solar input LED is not on as no solar panel was attached when the photo was taken):

In addition, Anderson plugs were installed into the side of the battery box and into the area near the jack. Here is the passenger side of the battery box, just below the lid hinge:

The Anderson plug near the jack will have this plugged into it, which will be mounted next to the drawers:

Out of picture is the Anderson plug that will fit into the jack area Anderson plug.

Grenadier build – Expedition HQ – Part 1

Now a detailed breakdown of the Expedition HQ work.

When the REDARC TowPro was installed yesterday, at Expedition HQ, The Doc had the REDARC controller installed on a Lightforce Switch Fascia. You can see the steering column in the second image.

I will be installing a USB charging port in the LF Fascia powered by the driver’s side power socket.

The Doc may also install a REDARC Boost and EGT Gauge and its dimmer switch can be installed in the LF Fascia as well. A picture of the gauge, not the boring dimmer switch.

The LF Fascia can be used for other purposes, like a UHF pass through, compressor switch, etc. The Doc thought it best to have a fascia for future needs and not mess up the INEOS any more and The Doc has a neat and tidy solution for nay more switches.

Grenadier build – Expedition HQ install

The Doc had Expedition HQ, on the Gold Coast, fit the Redarc TowPro Kit, the 13 pin Euro plug was replaced by a 12/7 pin flat pin on its own wiring loom, various Anderson plugs were fitted (5 in total). Two for solar input, 2 for fridges and the last for towing, A CTEK 250SE was mated to the 120S and lastly the Clevershade 270 Awning was fitted. A long day and most of the changes are hidden.

The same Clevershade awning fitted to a LC300.

Grenadier build – UHF install

AERIALS FITTED
The aerial on the left of screen is the RFI CD63 Black 6.5dbi removable aerial. It is very thin, so the driver’s vision is barely impacted. The twists you see 1/2 down the whip is there to absorb vibrations/corrugations. When travelling across corrugations The Doc calls it the hula girl.

This aerial is fitted to a GME TX3520S.

The aerial on right of screen is the RFI CD961-71-75. It has interchangeable antenna whips which operate at 6.5dBi and 3dbi. The 3dbi whip is tiny at about 10cm long. The larger 6.5dBi antenna is fitted in the picture. This aerial is fitted to a GME XRS390C. I have a GME XRS-BT1 hands free kit to install on the GMEXRS390.

The handsets are mounted on the passenger’s side of the centre console, using the Brodit bracket.

The basic cable feed is shown in the second image.

Grenadier build – the fit-out continues

Dashcam (Blackvue DR970X), Cellink NEO Plus dashcam battery and CAT III Rust Reduction system now installed, thanks to Adam’s Auto Accessories. Email: adams_auto_accessories@hotmail.com, Mobile: 0405 221 994. Contact Adam Rando. Quality work at a competitive rate.

Fire Extinguisher also mounted behind the driver’s headrest. It is a Firestryker fitted on Quick Fist Rubber Brackets, attached to the cargo barrier, with a few mods.

Spare 17 inch steel rim bought and picked up in Brisbane, way cheaper than buying from INEOS.

In a few days the Redarc TowPro and Anderson plugs are fitted. The Clevershade 270 Awning gets fitted the same day, the next day The Doc installs the 160W Kings solar panel.